When you are involved in a criminal case, there are numerous stages that you go through before a final resolution. Among these stages, noticing that your case status has changed to “disposed” can be confusing. It is essential to understand what this means and what you should do next. Knowing the steps in the criminal case resolution process helps you avoid unnecessary stress and ensures you fulfill all your obligations.
Understanding What “Disposed” Means
First, you need to know what “disposed” indicates. In legal terms, a disposed case is one that has been resolved. This does not always mean the charges were dismissed. It simply shows that the court has made a final ruling or decision regarding the case.
The disposition can include various outcomes such as conviction, acquittal, dismissal, deferred judgment, or even a plea deal. Each outcome carries different consequences and responsibilities for you.
Review the Final Court Decision
Once you see the status as disposed, obtain and review the final court order or judgment. This document contains essential details about what the court decided. You can get a copy from the court clerk’s office or online, depending on your jurisdiction.
Make sure you read it thoroughly to understand if you were convicted, if charges were dismissed, or if there are fines, probation, or other penalties imposed. Misunderstanding the outcome can lead to serious legal trouble in the future.
Consult Your Attorney
Your attorney should be the first person you contact after seeing the disposed status. They can clearly explain the court’s decision and what it means for you. If you do not have a lawyer, it is wise to consider hiring one to interpret the judgment, especially if it involves probation terms, fines, or appeal options.
Your attorney will also advise if you can seal or expunge the record, appeal the decision, or if there are any additional court dates you need to be aware of.
Check for Pending Obligations
Often, disposed cases come with obligations. You may need to pay court fees, fines, restitution, or attend counseling sessions or community service. Ignoring these obligations can result in additional penalties or even arrest warrants.
Write down all responsibilities mentioned in the court order and create a timeline to fulfill them within the deadline. Keep receipts or documentation of every payment and program completion as proof.
Determine If You Need to File an Appeal
In some cases, you may wish to challenge the court’s decision. Appeals are time-sensitive, with strict deadlines ranging from a few days to weeks. Speak to your attorney immediately if you believe there were errors in the judgment, unfair trial procedures, or other grounds for appeal.
Filing an appeal does not guarantee reversal, but it is a legal right you should consider if you disagree with the final outcome.
Understand How It Affects Your Record
Having your case disposed means it will appear in your criminal record with the outcome attached. This can affect future employment, housing applications, and other aspects of life.
Discuss with your attorney whether you qualify for expungement or record sealing. Each state has different laws about eligibility, and clearing your record can significantly benefit your future opportunities.
Notify Relevant Parties
If you were on bond or had employment restrictions due to your case, inform your bail bondsman or employer about the disposition. This ensures you comply with legal reporting requirements and maintain professional transparency.
Monitor Your Record
Finally, check your criminal record a few weeks after the case is disposed to ensure it accurately reflects the outcome. Mistakes can happen in court reporting systems, and incorrect information could cause future complications.
Final Thoughts
Seeing your case status as “disposed” marks the end of the court process, but it is not always the end of your legal responsibilities. By understanding the steps in the criminal case resolution process, reviewing your court documents, consulting your attorney, and fulfilling all obligations, you can move forward with clarity and confidence.
Being proactive after disposition is crucial. It protects your rights, keeps you compliant with the law, and helps you plan your future without lingering legal uncertainties.
Ever wondered how companies raise money through IPOs? Or maybe what happens when existing shareholders want to offload their shares to the public? That’s where Offer for Sale (OFS) swoops in to save the day! If you’re scratching your head about what this term means or how it fits into the wild world of Initial Public Offerings (IPOs), don’t worry—we’ve got you covered.
So, what exactly is Offer for Sale in IPO? How does it differ from the traditional IPO process? And more importantly, should you as an investor be jumping in, treading cautiously, or steering clear?
Buckle up, because we’re about to break it all down—no jargon, no confusing finance-speak. Just a straight-up, friendly guide to help you wrap your head around OFS and how it fits into the bigger IPO picture.
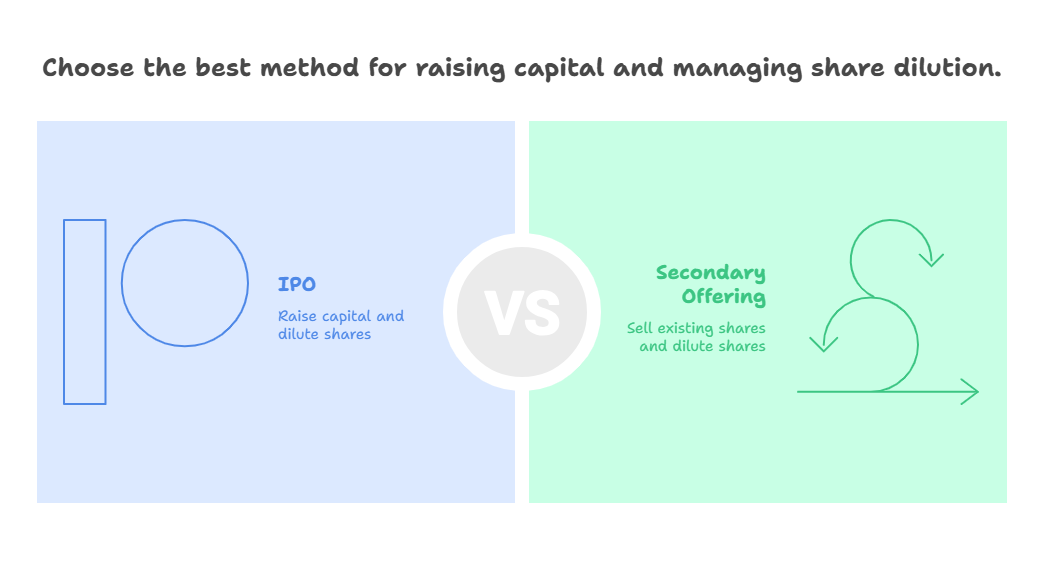
What is an IPO?
First things first—let’s get the basics down. An IPO, or Initial Public Offering, is when a private company says, “Hey, world, we’re going public!” It’s the moment they start selling shares to everyday investors like us. Companies do this to raise money for all sorts of reasons—expanding their business, paying off debts, or just giving their brand a big, shiny spotlight. Going public’s a huge deal, and it’s often a sign a company’s ready to play in the big leagues.
Why Companies Go Public
So, why bother with an IPO? Well, for starters, it’s a cash cow! Companies can rake in millions (or billions!) to fuel their growth. Plus, it gives early investors and founders a chance to cash in on their hard work. And let’s not forget the bragging rights—being listed on a stock exchange like the NYSE or NASDAQ is a serious flex.
Types of IPOs
Not all IPOs are the same, though. There are two main flavors:
Fresh Issue: This is when a company whips up brand-new shares to sell. The money goes straight into the company’s pockets to fund whatever they’ve got cooking—new factories, more staff, you name it.
Offer for Sale (OFS): Here’s our star! In an OFS, existing shareholders—like founders or venture capitalists—sell their shares to the public. The company doesn’t get a dime; the cash goes to the sellers instead. It’s like passing the baton to new owners.
What is Offer for Sale (OFS) in IPO?
An Offer for Sale (OFS) is a nifty mechanism where existing shareholders of a company—like promoters or big institutional investors—sell their shares to the public.It usually happens during an IPO or even as a standalone event in listed companies.
Here’s the twist: no new shares are issued. Instead, it’s a way for current stakeholders to offload part of their stake and cash out, while still giving the public a shot at owning a slice of the company.
In simple terms, imagine you own a popular café with your friends. When business booms and customers start lining up, one of your friends decides to sell their share in the café to others. That’s OFS—selling from the existing pie, not baking a new one.
How It’s Different from a Fresh Issue
Still fuzzy on the difference? No sweat—let’s break it down. In a fresh issue, the company’s the one cashing in by issuing new shares.The total number of shares goes up, and the company uses that money for its ownplans. With Offer for Sale, though, no new shares are born. It’s all about existing shares changing owners, and the cash lands in the sellers’ pockets—not the company’s. Here’s a quick rundown:
Fresh Issue: New shares, company gets paid.
Offer for Sale (OFS): Old shares, shareholders get paid.
How Does an OFS Work? Step-by-Step
Alright, let’s decode the workflow. Here’s what typically happens during an Offer for Sale:
1. Announcement
The company informs the stock exchange(s) about the OFS,at least two trading days prior.This includes the number of shares up for grabs and the floor price.
2. Designated Day for Bidding
Investors can place bids during market hours, usually from 9:15 AM to 3:30 PM.
3. Bidding Mechanism
Retail investors and institutions submit their bids.
They can bid at the floor price or higher.
4. Allocation
Shares are allocated based on price priority.
A certain percentage is often reserved for retail investors (typically 10%).
5. Settlement
Shares are credited to demat accounts, and funds go to the selling shareholders.
Benefits of Offer for Sale (OFS)
So, why go withOffer for Sale? It’s not just a random choice—it’s got some serious perks for everyone involved. Let’s check ’em out!
For the Company
No Ownership Shake-Up: Since no new shares are made, the company’s ownership stays the same. Promoters don’t lose their grip.
Less Hassle: If the company doesn’t need cash, OFS lets them go public without raising extra funds they don’t want.
Bigger Spotlight: Even with OFS, an IPO boosts the company’s rep and visibility. Who doesn’t love a bit of fame?
For the Shareholders
Cashing Out: Early investors or founders can finally turn their shares into cold, hard cash. After years of faith, it’s payday!
Liquidity Boost: OFS makes it easy to sell shares without hunting for a private buyer. Quick and painless!
For Investors Like Us
A Shot at the Action: OFS lets us buy into cool companies we’ve had our eye on.
Fair Pricing: The bidding process helps figure out what the shares are really worth—score!
Mixing It Up: Snagging shares through OFS is a great way to spice up our investment portfolios.
Sounds like a sweet deal, doesn’t it? But hold up—there’s a flip side too.
Risks and Considerations
Offer for Sale isn’t perfect. Like anything in the stock market, it’s got some risks worth thinking about. Let’s dig in!
What Could Go Wrong?
No Cash for Growth: Since the company doesn’t get the money, OFS won’t fund new projects or expansion. That might bum out investors hoping for big growth.
Price Pressure: A flood of shares hitting the market can push prices down. Too much supply, not enough demand—yikes!
Mixed Signals: If big shareholders are selling, some folks might wonder, “Do they know something we don’t?” It’s not always true, but it can spook the market.
OFS vs IPO vs FPO: A Quick Comparison
Feature
IPO
OFS
FPO
Purpose
Raise fresh capital
Existing shareholders sell
Company issues more shares
Share Dilution
Yes
No
Yes
Fund Recipient
Company
Existing shareholders
Company
Timeline
Long (weeks)
Short (1 day bidding)
Moderate
Regulatory Filing
Heavy compliance
Comparatively lighter
Moderate
Real-Life Examples of OFS
Let’s make things concrete with a few known names that used Offer for Sale:
Coal India Ltd
The government offloaded part of its stake to meet disinvestment targets.
ONGC
Another PSU example, where a sizable chunk was sold through OFS.
Hindustan Aeronautics Ltd (HAL)
Used OFS as a way to boost public shareholding and comply with norms.
These examples show that Offer for Sale isn’t just a theoretical idea—it’s widely used, especially by public sector undertakings (PSUs).
Tips for Investing in Offer for Sale
If you’re planning to dip your toes into an upcoming OFS, here’s how to play it smart:
Do Your Homework – Study the company’s fundamentals, check why the OFS is happening.
Don’t Chase Hype – If everyone’s jumping in, stop and think: are you buying quality or just following the herd?
Watch the Floor Price – Compare it with the market price—if it’s too close, gains may be minimal.
Use the Retail Quota Wisely – Sometimes retail investors get better pricing—take advantage of it.
Limit Your Bids – Don’t go overboard just because it’s cheaper.
FAQs
Q1. What is the main difference between Offer for Sale and IPO?
Ans: In an IPO, the company raises fresh capital by issuing new shares.In OFS, existing shareholders sell their shares—no fresh money goes into the company.
Q2. Can I apply for OFS via my regular trading app?
Ans: Yes! Most platforms like Zerodha, Groww, Upstox, and Angel One allow bidding for OFS under the “OFS” section.
Q3. Is there a minimum investment for OFS?
Ans: There’s no strict lower limit. However, the total bid amount must match or exceed the floor price.
Q4. What happens if I don’t get allocation?
Ans: If your bid doesn’t qualify, your money is refunded (or unblocked, if using UPI/ASBA).
Q5. Can OFS happen without an IPO?
Ans: Yes! OFS can be used by already listed companies to reduce promoter shareholding or meet SEBI regulations.
Conclusion
So, here’s the deal. Offer for Sale (OFS) in IPO is like a backstage pass for regular investors to grab shares directly from promoters or large investors. It’s fast, it’s transparent, and it’s often wallet-friendly. But just like any investment route, it comes with a few bumps and curves.
If you’re someone who enjoys exploring new stock opportunities beyond the regular IPO circus, OFS could be your secret weapon. That said, always keep your eyes open, do your research, and invest wisely. Because in the world of stocks, being smart beats being early—every time.
So, the next time someone throws around the term Offer for Sale, you can nod wisely and say, “Oh yeah, I know how that works!”
Meesho, the budget-friendly e-commerce platform, has submitted its draft red herring prospectus (DRHP) through the confidential pathway provided by the capital markets regulator, Securities and Exchange Board of India (SEBI), to secure Rs 4,250 crore in primary capital through an IPO.
The company based in Bengaluru seeks to generate ₹4,250 crore in primary capital via this initial public offering (IPO). This action places Meesho alongside an increasing number of modern companies aiming to go public on Dalal Street.
Reports suggest that the overall IPO size might hit ₹8,500 crore ($1 billion), including both primary capital and a secondary share sale aspect. The company is said to be aiming for a listing in the September-October timeframe this year.
Meesho IPO Confidential Submission
Meesho’s choice to follow the confidential filing approach is a strategic move. This method enables the company to protect confidential business data from competitors like Flipkart and Amazon.
Additionally, it offers the capability to review and modify IPO schedules if market circumstances change. This discreet filing approach has been embraced by other prominent modern companies, such as Pine Labs, Wakefit, Curefoods, Shadowfax, Groww, Steamhouse India, and PhysicsWallah.
For example, Shadowfax has also recently submitted confidential draft documents for a proposed IPO with a target of raising ₹2,000-2,500 crore.
Pre-IPO Reorganization and LocationChange
Before its public launch, Meesho has executed significant internal reorganization. The company has restructured its board, converted into a public entity, and finalized its ‘flip’ back to India, officially relocating its domicile from the United States. This involved the combination of its Delaware-based unit, Meesho Inc., with its Indian entity, Fashnear Technologies Private Limited. The merger received approval from the National Company Law Tribunal (NCLT) in May.
On May 13, 2025, Fashnear Technologies Private Limited was officially rebranded as Meesho Pvt Ltd, reflecting the company’s commitment to enhancing its brand identity as a prominent Indian e-commerce platform.
Shareholders had earlier given their consent for the IPO and a modification in the title of co-founder and CEO Vidit Aatrey to Chairman and Managing Director.
EconomicStrength and Market Environment
Established in 2015 by Vidit Aatrey and Sanjeev Barnwal, Meesho functions as an affordable e-commerce platform mainly catering to online buyers in tier-2, tier-3 cities and other areas.
The firm has garnered substantial funding from notable organizations such as SoftBank Group, Fidelity Investments, Prosus, and Peak XV Partners, with its most recent valuation approaching $4 billion. Financially, Meesho showcased strength in the fiscal year 2023-24, as its revenue rose by 33% to ₹7,615 crore.
Significantly, its loss reduced to ₹53 crore in FY24, reflecting a major enhancement from a loss of ₹1,569 crore (excluding ESOP expenses) in FY23. These economic enhancements arise as India’s Nifty 50 has bounced back from reaching a 12-month low earlier this year, suggesting a possibly more positive market sentiment for new IPOs.
Market Environment and IndustryConsequences
Meesho’s IPO arrives during a revival in India’s tech IPO landscape, as numerous digital-centric firms have applied for public offerings in the past few months. The decision indicates a resurgence in investor interest for tech-driven, high-growth companies following an extended period of funding challenges.
Meesho’s public offering is anticipated to establish standards for valuation and governance within the e-commerce industry, possibly opening doors for other unicorns to access public markets.
Conclusion
Meesho’s secret DRHP submission for a ₹4,250 crore IPO signifies a crucial moment for India’s e-commerce and startup landscape. With solid financial expansion, strategic governance adjustments, and strong investor support, the company is ready for a significant market launch later this year. The success of the IPO will be monitored closely as an indicator for the upcoming wave of Indian tech listings.
Disclaimer: This news is solely for educational purposes. The securities/investments quoted here are not recommendatory.
Ever heard the phrase, “Good things come in small packages”? Well, when it comes to Indian Public Sector Undertakings (PSUs), that couldn’t be more accurate! Say hello to Miniratna Companies — the efficient, profit-making, and autonomous little dynamos that are driving India’s industrial and economic growth.
These aren’t your average government-run enterprises. Nope! Miniratnas are PSUs that have earned their badge of honor by consistently turning a profit, maintaining financial discipline, and showing serious potential for autonomy and excellence. While they might not be as giant as the Maharatnas or Navratnas, they’ve carved out their own niche in the Indian economy.
Let’s dive deep into the world of Miniratna Companies in India in 2025 — what they are, how they’re chosen, their unique privileges, and most importantly, a full list to feast your eyes on!
What Exactly is a Miniratna Company?
In simple terms, Miniratna Companies are profit-making Central Public Sector Enterprises (CPSEs) that enjoy a certain degree of operational and financial autonomy from the Government of India.
They’re categorized into two types:
Category-I Miniratnas
Consistently profitable for the last three years
Positive net worth
A pre-tax profit of ₹30 crore or more in at least one of the last three years
Eligible to invest up to ₹500 crore without government approval
Category-II Miniratnas
Consistently profitable for the last three years
Positive net worth
Eligible to invest up to ₹300 crore without government approval
These babies may be smaller than their “Ratna” siblings, but trust us—they pack a punch!
Eligibility Criteria: What Makes a PSU a Miniratna?
Before a PSU can wear the Miniratna crown, it must meet a few golden rules:
For Category-I:
Profit in the last three consecutive years
Pre-tax profit of ₹30 crore or more in at least one of those years
Positive net worth
Clear track record with no default to banks
For Category-II:
Profit in the last three consecutive years
Positive net worth
Good corporate governance standards
Once the Department of Public Enterprises (DPE) gives the nod, the PSU gets elevated to Miniratna status and earns some autonomy in investment decisions, joint ventures, and more.
Perks and Privileges of Being a Miniratna
Why’s everyone vying for Miniratna status? Because it opens up a world of possibilities! Here’s what these companies get once they’re in the club:
Investment Autonomy: Up to ₹500 crore (Cat-I) / ₹300 crore (Cat-II)
Joint Ventures: Freedom to enter domestic and international JVs
HR Freedom: Can hire and promote staff independently
Tech Upgrade: Faster modernization and tech collaboration
Brand Boost: Enhanced public and investor trust
Sounds like a sweet deal, right?
List of Miniratna Companies in India
Let’s get to the meat of the matter! Here’s your definitive list of Miniratna Companies in India as of 2025, updated with the latest data. We’ll separate them into Category-I and Category-II for better clarity.
Category-I Miniratna Companies (2025)
Here are the top-performing Miniratna Category-I companies, alphabetically arranged for ease of reference:
Airports Authority of India
Antrix Corporation Limited
Balmer Lawrie & Co. Limited
Bharat Coking Coal Limited
Bharat Dynamics Limited
BEML Limited
Bharat Sanchar Nigam Limited
Braithwaite & Company Limited
Bridge & Roof Company (India) Limited
Central Coalfields Limited
Central Electronics Limited
Central Mine Planning & Design Institute Limited
Chennai Petroleum Corporation Limited
Cochin Shipyard Limited
Cotton Corporation of India Ltd.
EDCIL (India) Limited
Garden Reach Shipbuilders & Engineers Limited
Grid Controller of India Limited (GRID-INDIA)
Goa Shipyard Limited
Hindustan Copper Limited
Hindustan Steelworks Construction Limited
Hindustan Organic Chemicals Ltd.
HLL Lifecare Limited
HSCC (India) Limited
India Tourism Development Corporation Limited
Indian Rare Earths Limited
India Trade Promotion Organization
KIOCL Limited
Mahanadi Coalfields Limited
MOIL Limited
Mangalore Refinery & Petrochemical Limited
Mineral Exploration Corporation Limited
Mishra Dhatu Nigam Limited
MMTC Limited
MSTC Limited
National Projects Construction Corporation Limited
National Small Industries Corporation Limited
National Seeds Corporation
Northern Coalfields Limited
North Eastern Electric Power Corporation Limited
Numaligarh Refinery Limited
Pawan Hans Helicopters Limited
Projects & Development India Limited
Security Printing and Minting Corporation of India Limited
South Eastern Coalfields Limited
Telecommunications Consultants India Limited
THDC India Limited
Western Coalfields Limited
WAPCOS Limited
Category-II Miniratna Companies (2025)
These are the rising stars—solid, stable, and ready to grow bigger!
Artificial Limbs Manufacturing Corporation of India
Broadcast Engineering Consultants India Limited
Engineering Projects (India) Limited
FCI Aravali Gypsum & Minerals India Limited
Ferro Scrap Nigam Limited
HMT (International) Limited
Indian Medicines & Pharmaceuticals Corporation Limited
MECON Limited
National Film Development Corporation Limited
Rajasthan Electronics & Instruments Limited
Note: This list is dynamic and may evolve as new companies meet the criteria or undergo restructuring.
Why Miniratna Companies Matter in India’s Growth Story
These companies may not grab the limelight like the Maharatnas, but let’s not forget — they’re the quiet warriors working behind the scenes. They:
Promote regional development
Boost employment in niche sectors
Encourage tech innovation in PSU space
Contribute significantly to national GDP
Think of Miniratna Companies as the unsung heroes in India’s economic symphony!
Listed Miniratna Companies in India
1. Hindustan Organic Chemicals
Hindustan Organic Chemicals Limited (HOCL), founded in 1960 under the Ministry of Chemicals & Fertilisers as a Miniratna Category-I company, was created to foster self-sufficiency in essential organic chemicals. It produces important items such as phenol, acetone, and hydrogen peroxide, which are crucial for sectors like pharmaceuticals, dyes, paints, rubber, and pesticides, significantly impacting daily uses.
2. MSTC Limited
MSTC Limited, a Miniratna Category-I CPSE affiliated with the Ministry of Steel, focuses on e-commerce solutions in multiple sectors. It provides e-auctions, e-sales, e-procurement, and tailored software solutions. The firm additionally manages the trading and disposal of scrap, excess items, minerals, and agricultural-forest products for public sector undertakings, private companies, and government agencies.
3. Balmer Lawrie & Co. Limited
Established in Kolkata in 1867 by two Scottish individuals, Balmer Lawrie is currently a Miniratna Category-I CPSU under the Ministry of Petroleum and Natural Gas. It functions through eight business segments, such as packaging, lubricants, chemicals, travel, logistics, and refinery services, with operations in India and internationally.
4. India Tourism Development Corporation Limited
India Tourism Development Corporation (ITDC), a Miniratna Category-I Public Sector Undertaking under the Ministry of Tourism, was founded in 1966. It provides extensive services in travel, tourism, and hospitality, such as accommodations, transportation, duty-free stores, and visitor guides. It additionally offers engineering consulting and carries out infrastructure initiatives and Sound & Light Displays for central and state administrations
5. MOIL Limited
MOIL Limited, established in 1962 as a Miniratna Category-I enterprise, is the leading producer and supplier of manganese ore in India. It provides high, medium, and low-grade ore, such as manganese dioxide and chemical-grade types, being essential for fulfilling the requirements of the nation’s steel industry.
6. Mishra Dhatu Nigam Limited
Mishra Dhatu Nigam Limited (MIDHANI), founded in 1973 under the Ministry of Defence, is a Miniratna Category-I firm and a prominent maker of special steels, superalloys, and the sole manufacturer of titanium alloys in India. Its unit in Hyderabad assists crucial sectors such as Defence, Space, Energy, and Aerospace.
7. Chennai Petroleum Corporation Limited
Chennai Petroleum Corporation Limited, established in 1965, is involved in refining crude oil and manufacturing petroleum products and lubricating oil additives.It is a Miniratna Category-I firm, and its main products consist of LPG, petrol, diesel, kerosene, aviation fuel, naphtha, bitumen, and lube base stocks.
8. MMTC Limited
MMTC Limited, a Miniratna Category-I PSU under the Ministry of Commerce & Industry, was founded in 1963 to bolster India’s international trade. It deals in minerals, metals, precious metals, fertilizers, agricultural products, coal, and hydrocarbons. MMTC exports minerals, imports essential commodities, and engages in joint ventures in sectors like steel, retail, warehousing, and commodity exchanges.
9. KIOCL Limited
KIOCL Limited, a Miniratna Category-I PSU under the Ministry of Steel, was established in 1976. Located in Karnataka, it focuses on the extraction and processing of low-grade iron ore to produce superior BF and DR grade pellets. KIOCL has implemented measures such as coastal transport, local equipment production, and international ore procurement to enhance efficiency and sustainability.
10. BEML Limited
BEML Limited, a Miniratna Category-I PSU under the Defence Ministry, produces heavy machinery for the mining, construction, defence, and railway industries. It manufactures high-mobility defense vehicles, earth-moving equipment such as bulldozers and excavators, and provides rail coaches, metro cars, and wagons to Indian Railways and metro systems.
11. Mangalore Refinery & Petrochemical Limited
Mangalore Refinery and Petrochemicals Limited (MRPL), a Miniratna Category-I CPSE under the Ministry of Petroleum & Natural Gas, runs a refinery that manufactures a diverse array of products such as LPG, petrol, diesel, kerosene, aviation fuel, naphtha, bitumen, pet coke, and polypropylene.
12. Hindustan Copper Limited
Hindustan Copper Limited (HCL), a Miniratna Category-I CPSE under the Ministry of Mines, was established in 1967. It is the sole company in India engaged in the complete copper production process, from extraction to the marketing of copper products. HCL concentrates on exploring, mining, and processing copper ore to generate copper concentrate.
13. Garden Reach Shipbuilders & Engineers Limited
Garden Reach Shipbuilders & Engineers Ltd (GRSE), established in 1934, is a Miniratna Category-I CPSE and a prominent shipbuilding firm operating under the Ministry of Defence. It mainly caters to the Indian Navy and Coast Guard and is the first Indian shipyard to export military ships and provide 100 vessels.In addition to warships, GRSE constructs boats, barges, tugs, ferries, and various other maritime vessels.
14. Cochin Shipyard Limited
Cochin Shipyard Limited (CSL), established in 1972, is a prominent shipbuilding company focusing on the construction, repair, and refurbishment of different kinds of ships. It is a Category-I Miniratna CPSE. CSL has constructed and restored some of the largest ships in the world and has exported approximately 45 vessels. Its knowledge ranges from bulk carriers to sophisticated vessels such as Platform Supply Vessels and Anchor Handling Tug Supply Vessels.
15. Bharat Dynamics Limited
Bharat Dynamics Limited (BDL) was established in 1970 and is recognized as a Miniratna Category-I enterprise. It is a public sector unit under the Ministry of Defence. It produces guided missiles, underwater arms, aerial systems, and various defense gear for the Indian Armed Forces. BDL provides life cycle assistance, renovation, and service extension for current defense systems.
Key Sectors Where Miniratnas Shine Bright
Here’s where you’ll find most of these companies flexing their muscles:
Future Outlook: What Lies Ahead for Miniratnas in 2025 & Beyond?
With India gearing up for a $5 trillion economy, Miniratna Companies are expected to:
Play a bigger role in Make in India and Digital India
Attract global investments and joint ventures
Get upgraded to Navratna status as they grow
Serve as innovation hubs in specialized sectors
Government reforms in PSU policies have already given them the wings. It’s just a matter of time before many of them take flight!
FAQs on Miniratna Companies
1. What is the difference between Miniratna, Navratna, and Maharatna?
Miniratna companies are smaller PSUs with limited autonomy. Navratna and Maharatna are larger and more profitable PSUs with greater freedom in investments and strategic decisions.
2. Can Miniratna Companies become Navratna?
Absolutely! If they meet the required criteria (size, profits, global presence), they can be upgraded.
3. Are Miniratna Companies safe to invest in?
While many are stable and profitable, they still operate under market conditions. So, research is key before investing.
4. Who decides Miniratna status?
The Department of Public Enterprises (DPE), under the Ministry of Heavy Industries, grants Miniratna status.
5. How many Miniratna Companies are there in India in 2025?
As of 2025, there are around 55–60 recognized Miniratna Companies across both categories, with new ones joining the list periodically.
Final Thoughts
Miniratna Companies might not always make headlines, but they’re the lifeblood of several strategic sectors in India. From railways to energy, education to aerospace, they’re silently scripting India’s growth story—one efficient operation at a time.
So next time someone talks about the bigwigs like ONGC or SBI, don’t forget to give a shout-out to the Miniratnas—the pocket-sized powerhouses of Bharat’s economic engine!
Want to stay updated with PSU reforms, investment ideas, or sectoral growth stories? Bookmark this article or subscribe to our newsletter—because there’s more to India’s economic magic than meets the eye!


 in IPO and Why Should You Care?")